Clients & Projects
This guide covers creating clients, setting up projects, inviting team members, and configuring project settings.
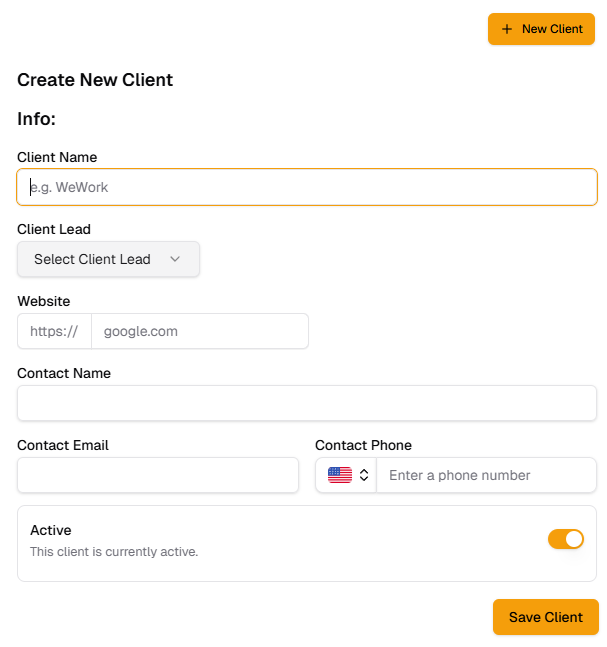
Creating a New Client
- In the sidebar, click Clients.
- Click + New Client.
- Fill in the client details form (name, contact information, etc.).
- Click Save.
Creating a New Project
- In the sidebar, click Projects.
- Click + New Project.
- Select the Client this project belongs to.
- Enter a Project Name and Description.
- Click Create Project.
Project Onboarding Flow
After saving a new project, Octayne walks you through the onboarding flow to configure essential details.
Step 1 -- Project Details
- Assign a Project Lead.
- Set the Start Date and End Date.
- Select the Project Type.
- Enter the Budget amount and Budget Hours.
- Click Next to continue.
Step 2 -- Team Members
See the section below on adding Team Members.
Step 3 -- Billing Codes
See the section below on adding project billing codes.
Step 4 -- Board Fields
See the section below on adding board fields.
Tip: You can revisit any of these settings later through Project Settings.
Inviting Team Members to Projects
Inviting Team Members to Projects
- Select team members from your Organization Members pane.
- Click the arrow to move them into Project Members pane.
- Click Next to continue.
After Project Creation
- Navigate to Project Settings > Members.
- Click + Add Member.
- Select the team member(s) you want to add to the project.
Adding Team Member Roles, Positions & Rates
Each team member on a project needs a position, billing rate, and payout rate.
During Project Onboarding
- In the Team Members step of project onboarding, select each member after adding them.
- Assign their Position.
- Enter their Rates.
- Repeat for each member, then click Next to continue.
After Project Creation
- Navigate to Project Settings > Members.
- Click on a team member to edit their Position and Rates.
Note: Rates set here are used for billing calculations on the project.Adding Project Billing Codes
Billing codes (task types) define the categories of work that can be tracked on a project.
During Project Onboarding
- In the billing codes step, add the codes relevant to the project.
- Click Next to continue.
After Project Creation
- Navigate to Project Settings > Task Type Definition.
- Click + Add.
- Enter the billing code name and any additional details.
- Click Save.
Adding Board Fields
Board fields let you customize the project board with additional data columns.
During Project Onboarding
- In the board fields step, click + Add.
- Enter a Field Name.
- Select a Field Type (text, number, dropdown, date, etc.).
- Repeat for additional fields, then click Next.
After Project Creation
- Navigate to Project Settings > Board.
- Click + Add.
- Fill in the Field Name and Field Type.
- Click Save.
Creating Projects from Templates
If your organization has saved project templates, you can use them to speed up setup.
- In the sidebar, click Projects.
- Click + New Project.
- If templates are available, select a Template from the list.
- The project will be pre-configured with the template's settings (billing codes, board fields, team roles).
- Adjust any details as needed and click Save.
Note: Templates are created by administrators. If you do not see any templates, contact your admin.